A Finished Table Runner (AKA My Coffee Table Finally Has A Handmade Runner!)
Me again!
(I know, no posts for months and then loads in one week. I'm going to try to be better next quarter! Crowd (off): mutters We've heard that before...)
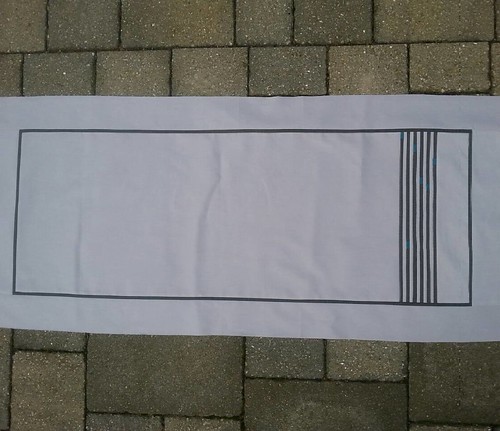
Way back in October, I started work on a tutorial for the 2016 FAL and chose to demonstrate how to accurately insert narrow (1/4") strips into a piece of fabric and, of course, I needed a project to demonstrate it on. I decided to make a table runner from pale grey Oakshott, with strips of darker grey inserted (and with blocks of turquoise inserted into those). I didn't manage to get the runner quilted, so at the start of this quarter, it looked like this:
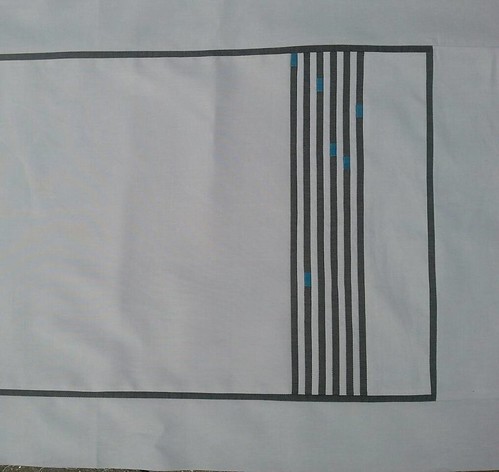
And here's a closer look at those inserted strips:
I spent a while puzzling how to quilt it until I took it to show a friend and we puzzled together and eventually decided that echoing the strips down the length of the runner would look quite nice.
I measured the width of the inserted section (11 x 0.25" = 2.75") so I knew how wide each quilted section needed to be, looked at the runner and decided how many sections I wanted (four), and then took four lots of 2.75" away from the length of the central section to give me the distance between each section. (Still with me?!) I then marked either edge of each section with a hera marker and got quilting, using the quarter inch mark on my walking foot as a guide for the bits in between the marked lines.
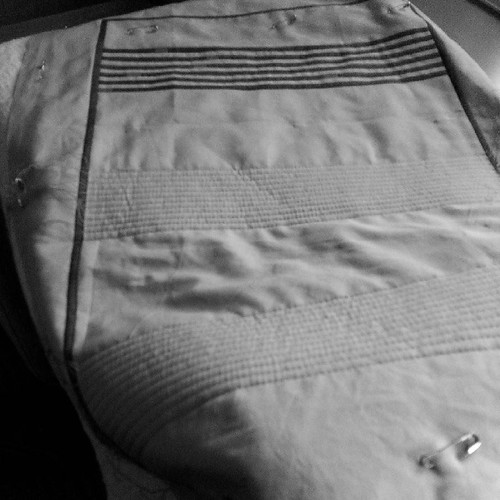
Here it is halfway through:
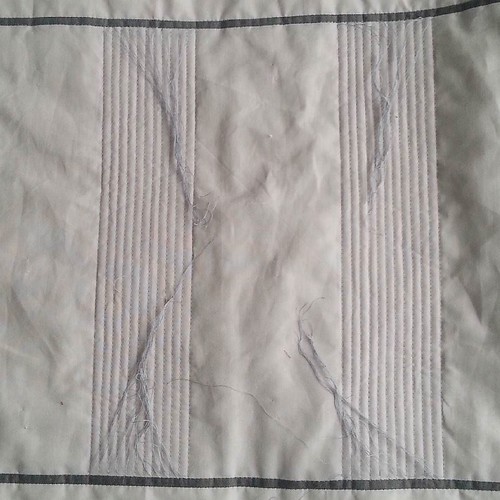
And here's what it looked like after I'd finished the quilting, but before I'd started darning in the ends:
As well as quilting the sections, I quilted in the ditch along the outer edges of the inserted section and either side of the narrow border (you can just see it in the photo above).
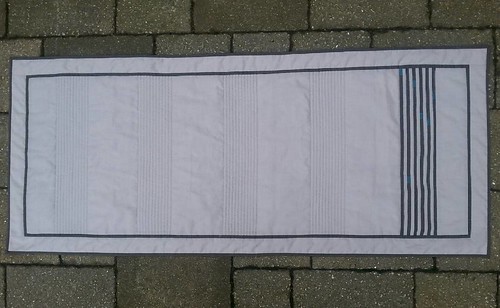
And here it is finished:
I'll be honest, I didn't like it at first! I think it was partly because I loved it so much as a flat piece of fabric that seeing the quilting took some getting used to and I felt that the unquilted bits were a bit stark. I almost threw it in the wash to get it crinkled, but decided I needed to live with it first as you can't uncrinkle a quilt. At the moment, I like it a lot more and it is currently uncrinkled. Of course, it will need washing at some point and it will crinkle (it'll probably need blocking to make sure it still lays flat after washing), and that's fine, but at least I gave uncrinkled a chance!
As it's the end of the quarter, I'm linking up to the Finish-Along finishes link. My Q1 FAL list can be found here and this post is about item 18.
Thanks for popping in!
(I know, no posts for months and then loads in one week. I'm going to try to be better next quarter! Crowd (off): mutters We've heard that before...)
Way back in October, I started work on a tutorial for the 2016 FAL and chose to demonstrate how to accurately insert narrow (1/4") strips into a piece of fabric and, of course, I needed a project to demonstrate it on. I decided to make a table runner from pale grey Oakshott, with strips of darker grey inserted (and with blocks of turquoise inserted into those). I didn't manage to get the runner quilted, so at the start of this quarter, it looked like this:
And here's a closer look at those inserted strips:
I spent a while puzzling how to quilt it until I took it to show a friend and we puzzled together and eventually decided that echoing the strips down the length of the runner would look quite nice.
I measured the width of the inserted section (11 x 0.25" = 2.75") so I knew how wide each quilted section needed to be, looked at the runner and decided how many sections I wanted (four), and then took four lots of 2.75" away from the length of the central section to give me the distance between each section. (Still with me?!) I then marked either edge of each section with a hera marker and got quilting, using the quarter inch mark on my walking foot as a guide for the bits in between the marked lines.
Here it is halfway through:
And here's what it looked like after I'd finished the quilting, but before I'd started darning in the ends:
As well as quilting the sections, I quilted in the ditch along the outer edges of the inserted section and either side of the narrow border (you can just see it in the photo above).
And here it is finished:
I'll be honest, I didn't like it at first! I think it was partly because I loved it so much as a flat piece of fabric that seeing the quilting took some getting used to and I felt that the unquilted bits were a bit stark. I almost threw it in the wash to get it crinkled, but decided I needed to live with it first as you can't uncrinkle a quilt. At the moment, I like it a lot more and it is currently uncrinkled. Of course, it will need washing at some point and it will crinkle (it'll probably need blocking to make sure it still lays flat after washing), and that's fine, but at least I gave uncrinkled a chance!
As it's the end of the quarter, I'm linking up to the Finish-Along finishes link. My Q1 FAL list can be found here and this post is about item 18.
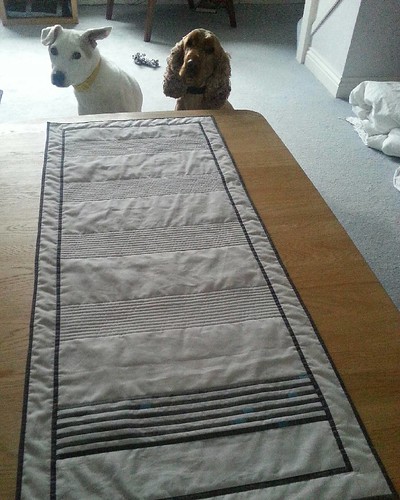 |
| We like it, but it would be enhanced by the addition of biscuits |
Fantastic quilting choice. I love the simplicity of this table runner!
ReplyDeleteI absolutely adore it quilted! It's a good thing you don't live closer, otherwise I might come "borrow" it from you. ;)
ReplyDeleteLovely to see this one again - perfect quilting choice!
ReplyDeleteWell I think it is beautiful, but I get it as that happens to me most times after I finish something, I have to live with it for a while before i love it again. Thank you for linking up on behalf of the 2017 global Finish-A-Long hosts.
ReplyDeleteGorgeous table runner, gorgeous ear action, whats not to love! X
ReplyDeleteThank you for the tutorial on how to do this. The runner looks so nice.
ReplyDeleteSuch Sewing Precision .
ReplyDeleteYour attention to detail never fails to make me feel like a complete klutz!
Those boys look so innocent!