Blue And White HSTs - Two Cushions
I'm back again with another finish! (I have seven in total this quarter so expect a flurry of posts from me as I catch up with myself.)
Following on from yesterday's post about the blue and white quilt, today's post is about the two cushions I made to go with the quilt, which were made from the 'bonus' HSTs created when I made the snowball blocks (although I'm not sure 'bonus' and '508 1" HSTs' should be seen in the same sentence).
Back in August 2015, while I watched many episodes of something on DVD (I know not what, I suspect I've blanked it out in order to blank out the reason I was watching them, namely...), I set the seams on, and then pressed open, 508 HST units. They then needed trimming to a uniform size (1.5" square), which I did over many (many!) evenings while watching telly. I had a nice little system sorted with a mini cutting board on an old Next catalogue on my knee, a box for the trimmed units on one side of me, and a box for the trimmings on the other. Believe me, trimming that many squares is as boring as it sounds, but waste not, want not!
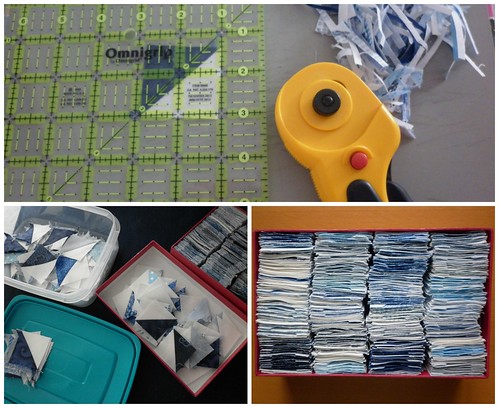
I then stacked them neatly away in a box and tried to forget about them:
but not before I'd had a little play to see what I could make:
I knew I wanted to make two rectangular cushions to go with the quilt, I just didn't know what they were going to look like (I preferred the centre design, even back then). Or how I'd face piecing all the units!
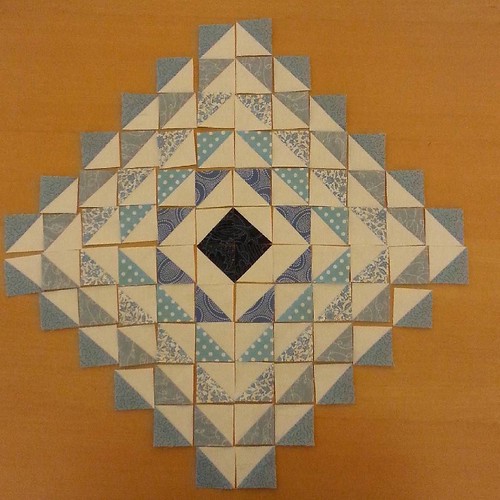
In December, I realised I could possibly get the quilt finished in time for Mam's birthday and decided that I'd also try to make the two companion cushions I'd been planning so I could give her them all together. The first thing I did was sort all the units by print and stack them on my sewing table, and then I counted the units in each stack and labelled them. It might seem excessive, but it meant that I knew how many of each print I had and didn't waste time choosing a print only to find I didn't have enough units to complete a round. This was my first attempt, once I'd decided what sort of design to do:
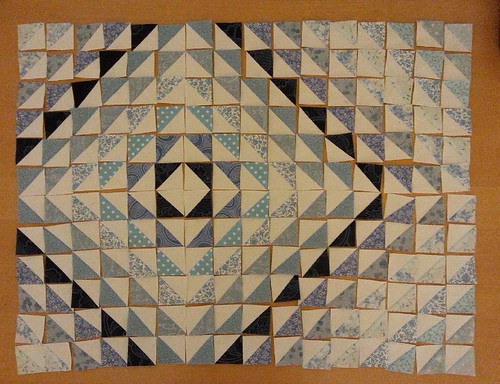
but something wasn't quite right. I played about a bit more and tried out both a centred and off-set design and asked my friends on instagram for help as it still wasn't right:

Through discussion, we decided that two things were wrong: the centre triangles needed to point out, not in (i.e. there should be a centre square of white, not blue) and (related to this), the dark centre felt like something was watching you (thanks for pointing it out, Jenny, although I'm not sure you used those words!). And that off-centre looked better:
With that, I drew a plan of the panel and counted how many units were needed for each round (yes, really!), which was a lot less tiring than doing it by trial and error with the units themselves. For a start, I could sit on the settee and do it rather than stooping over my bed!
Once that was done, I laid out two cushion panels on my bed (honestly, this playing with HSTs is really boring and my back ached from all the stooping!), did a bit of faffing and then took two awful photos so I knew what went where. (Awful because it was early afternoon on a December in the UK and it was starting to get dark, and because I was jiggered and struggled to hold the camera high enough to get a whole panel in!)
I started piecing after a bit of a rest (no time for more!) and joined the units into columns, mainly so I could get them off my bed so I could get on it, but took a moment to enjoy the shrinkage that happens when you start to piece:

Over the next few days (with Christmas in the mix as well), I pressed the columns and then started to pin them into pairs, ready to sew when I was able:

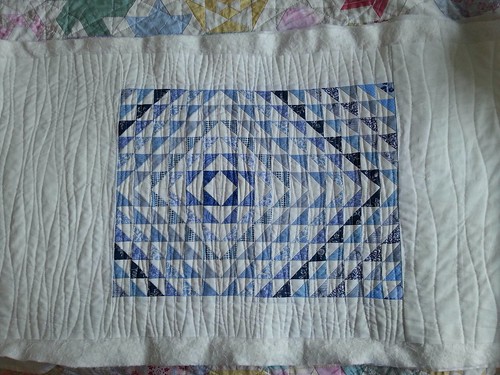
By early January, the panels were pieced:
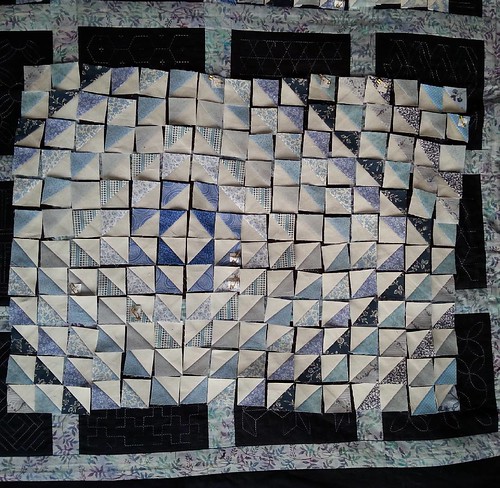
I then layered, pinned and quilted them, and by the start of the quarter, had the two almost-finished-the-quilting panels you can find on my FAL list:
I'll be honest and tell you that the quilting started out, well, terribly. I started with these wavy lines, hated them, unpicked them, did straight lines, hated them, redid the wavy lines, hated them...and then remembered that wavy lines always look dreadful when you start and that they only start to look better as you do more of them, something to do with them looking shonky when sparse, but deliberate and textured when denser. So I ploughed on, and I'm glad I did!!
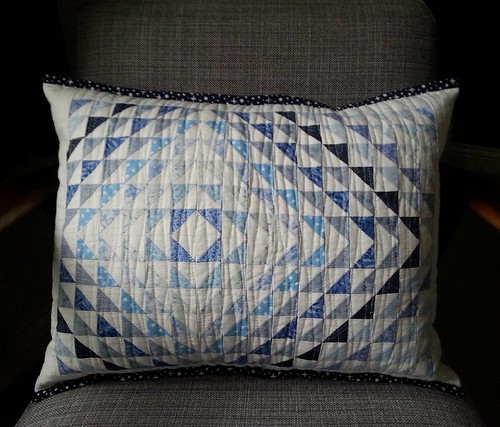
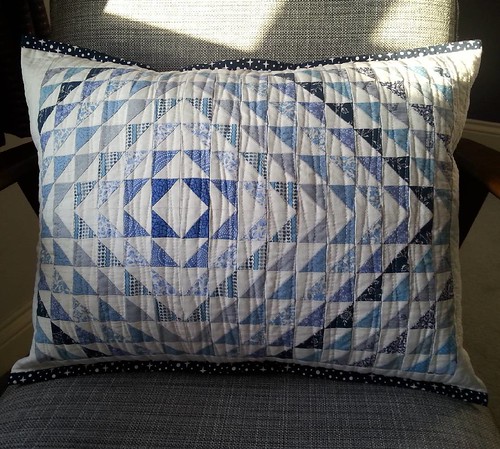
I had just enough binding fabric from the quilt left to eke out four strips for the cushions, and after a bit of hand stitching, and then altering two pillows into cushion inners (the cheapest and easiest way to get cushion inners the size you want), I had two finished cushions:
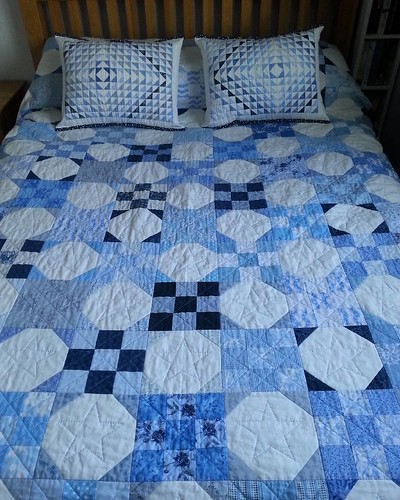
And here's how all three finishes look together:
My Q1 FAL list can be found here and this post is about item three, one of the pair of blue and white HST cushions. I'm linking the first finished cushion up with this post (the one with the slightly lighter centre) and will link the other up with instagram.
Following on from yesterday's post about the blue and white quilt, today's post is about the two cushions I made to go with the quilt, which were made from the 'bonus' HSTs created when I made the snowball blocks (although I'm not sure 'bonus' and '508 1" HSTs' should be seen in the same sentence).
Back in August 2015, while I watched many episodes of something on DVD (I know not what, I suspect I've blanked it out in order to blank out the reason I was watching them, namely...), I set the seams on, and then pressed open, 508 HST units. They then needed trimming to a uniform size (1.5" square), which I did over many (many!) evenings while watching telly. I had a nice little system sorted with a mini cutting board on an old Next catalogue on my knee, a box for the trimmed units on one side of me, and a box for the trimmings on the other. Believe me, trimming that many squares is as boring as it sounds, but waste not, want not!
I then stacked them neatly away in a box and tried to forget about them:
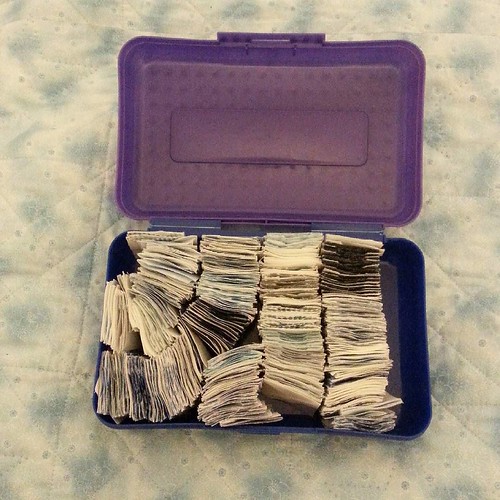 |
| Don't know why that photo's so poor, sorry! |
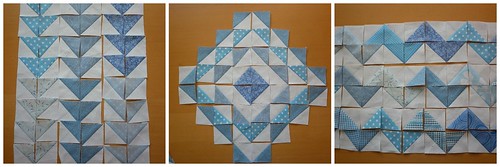 |
| Playing with 508 HST units is less fun than you'd think, which is why I combined two designs into one in the centre photo! |
In December, I realised I could possibly get the quilt finished in time for Mam's birthday and decided that I'd also try to make the two companion cushions I'd been planning so I could give her them all together. The first thing I did was sort all the units by print and stack them on my sewing table, and then I counted the units in each stack and labelled them. It might seem excessive, but it meant that I knew how many of each print I had and didn't waste time choosing a print only to find I didn't have enough units to complete a round. This was my first attempt, once I'd decided what sort of design to do:
but something wasn't quite right. I played about a bit more and tried out both a centred and off-set design and asked my friends on instagram for help as it still wasn't right:
Through discussion, we decided that two things were wrong: the centre triangles needed to point out, not in (i.e. there should be a centre square of white, not blue) and (related to this), the dark centre felt like something was watching you (thanks for pointing it out, Jenny, although I'm not sure you used those words!). And that off-centre looked better:
With that, I drew a plan of the panel and counted how many units were needed for each round (yes, really!), which was a lot less tiring than doing it by trial and error with the units themselves. For a start, I could sit on the settee and do it rather than stooping over my bed!
Once that was done, I laid out two cushion panels on my bed (honestly, this playing with HSTs is really boring and my back ached from all the stooping!), did a bit of faffing and then took two awful photos so I knew what went where. (Awful because it was early afternoon on a December in the UK and it was starting to get dark, and because I was jiggered and struggled to hold the camera high enough to get a whole panel in!)
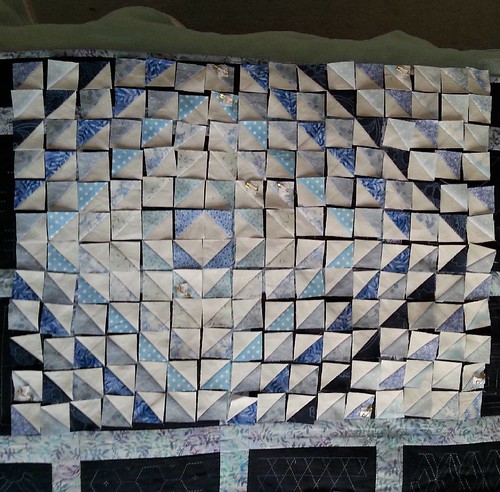 |
| The safety pins are holding on the number tags |
I started piecing after a bit of a rest (no time for more!) and joined the units into columns, mainly so I could get them off my bed so I could get on it, but took a moment to enjoy the shrinkage that happens when you start to piece:
Over the next few days (with Christmas in the mix as well), I pressed the columns and then started to pin them into pairs, ready to sew when I was able:
By early January, the panels were pieced:
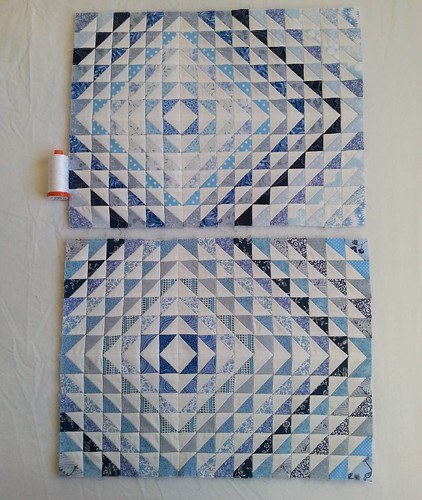 |
| The photo is slightly misleading because I used Aurifil 2600 (dove grey) to piece them, not the white (2024) shown in the photo, that's there for scale. And because the pale grey was still on my machine! |
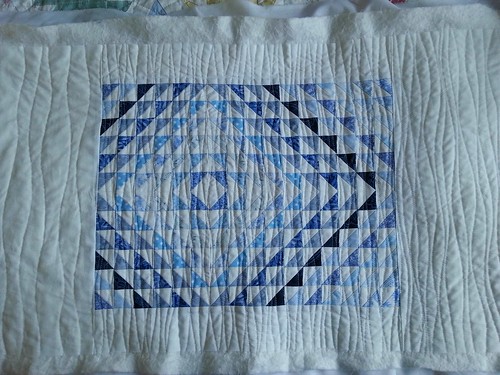 |
| You can see that the left-hand side of the top panel and the right-hand side of the lower panel aren't quilted as densely at this point. |
I'll be honest and tell you that the quilting started out, well, terribly. I started with these wavy lines, hated them, unpicked them, did straight lines, hated them, redid the wavy lines, hated them...and then remembered that wavy lines always look dreadful when you start and that they only start to look better as you do more of them, something to do with them looking shonky when sparse, but deliberate and textured when denser. So I ploughed on, and I'm glad I did!!
I had just enough binding fabric from the quilt left to eke out four strips for the cushions, and after a bit of hand stitching, and then altering two pillows into cushion inners (the cheapest and easiest way to get cushion inners the size you want), I had two finished cushions:
And here's the back of one of them (they're both the same):
 |
| The zip flap is made from the off cut of backing created when I trimmed the quilt |
And here's how all three finishes look together:
My Q1 FAL list can be found here and this post is about item three, one of the pair of blue and white HST cushions. I'm linking the first finished cushion up with this post (the one with the slightly lighter centre) and will link the other up with instagram.
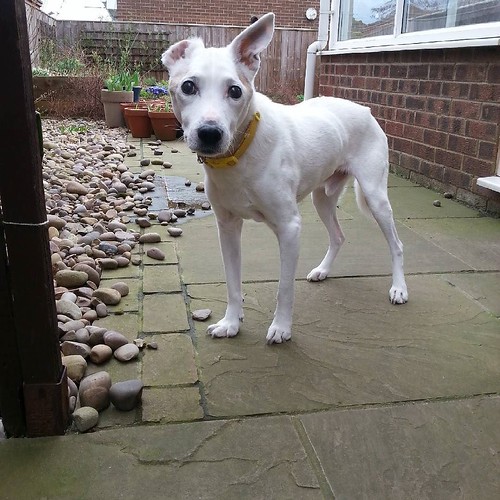 |
| I told you: no photos with my ear inside out! |
Thanks for popping in!
These are so cool and beautiful! Fabulous finishes, even if I still think those HSTs are a bit insane! Stunning, but insane.
ReplyDeleteThey are really stunning!
ReplyDeleteYou are a glutton for punishment, but I have to say, it was totally worth it. And look at you, months with nothing and then two posts come along at once...
ReplyDeleteTiny snippets of Blue and White get everybody's hearts a flutter . . and these 2 cushions are no exception.
ReplyDeleteA lot of hard work but so delightful
Well Done!
Funny Archie!
Goodness they took some stamina but they are truly stunning.
ReplyDeleteWell worth all the effort - you must be pleased with the outcomes!
ReplyDeleteBeautiful cushions. Love how you organized those 508 hsts. That was a huge job with a beautiful ending. Love your ear Archie.
ReplyDeleteSo glad I dropped in to see these finished, they are drop dead gorgeous and a testament to your skills and determination.xx
ReplyDeleteOh gosh, I think the quilt alone would have put me off blue and white for a while! Great bonus project and I love the quilting - I'll have to try that - but without the false starts?????
ReplyDeleteLove the pillows! So worth all the fuss.
ReplyDeleteAmazing. As a fan of scrappy and gradient, it's spot on my taste! The epic quilt deserves a special coordinate. Congratulations on your finished goal. On behalf of your fellow 2017 FAL hosts, thanks for linking up and sharing your work! Great Job.
ReplyDelete