Finish-Along Tutorial: How To Add An Accurate Quarter Inch Strip

I thought I'd share a nifty technique for adding accurate (and straight!) quarter inch strips to a project - it could be for some teeny tiny piecing/strip piecing (just think how accurate and square a 3/4" finished nine patch would be!), an accent strip in a block or on a pouch, or for some Seminole work. It can also be adapted for other widths, particularly three-eighths or half an inch, simply by using a different foot (I use my number one foot, which is the all-purpose zigzag foot which came with the machine) and moving your needle to the right.
For this tutorial, my sample piece is a table runner. As you can see, I've got both dark grey (the accent) and pale grey (the background) strips, but you can adapt this however you like, it's just to demonstrate the technique.
You'll need to cut 1" strips of the fabrics you wish to join as quarter inch strips (mine is the dark grey Oakshott) and whatever size piece you wish to add it to (I'm calling this the background fabric, simply for ease, and in my project, the pale grey Oakshott is my background fabric).
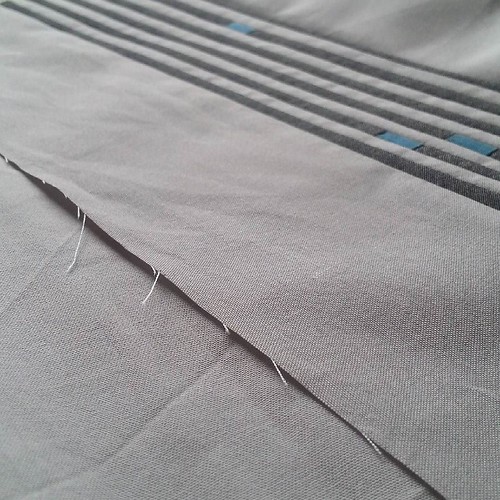
Carefully join one of the accent strips to the background fabric with your usual quarter inch seam allowance, as shown below. You need to sew carefully because any wobble now will follow you through the rest of the project/across the strip!
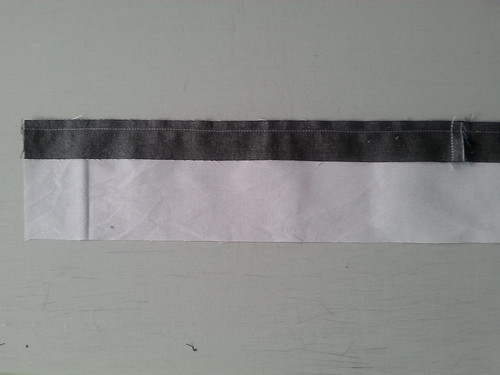
Set the seam, and then press it towards the background fabric. It is important that you press the seam this way or the next step won't work!
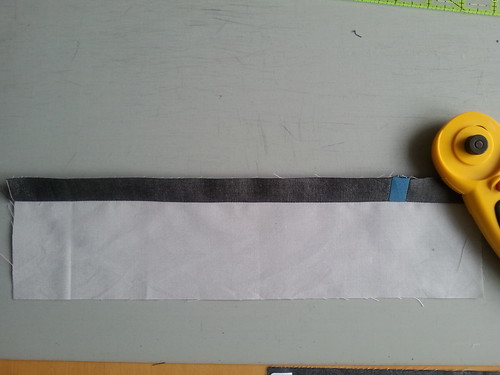
Lay the fabric right side up and trim the accent strip to 1/2" wide, using the seam you've just sewn as a guide. (You'll be trimming off around quarter of an inch, which is how much wider you cut the strip in the first place.)
Pin on another accent strip (as I'm alternating dark and pale grey strips, for this next step I attached a pale grey strip) and lay it on the machine bed so that the (new) 1" strip is on the bottom. (If you're just adding one quarter inch strip, then this new piece will be however wide you want it.) Now, this is the nifty bit! Sew these two pieces together, but...wait for it...instead of using the raw edge as your guide, line the left-hand edge of your quarter inch foot up with the stitching line you stitched in the first step, and follow that. (See how any wobbles in the first line will follow you?!) You can see in the photo how the raw edge isn't perfectly in line with the edge of the foot, but that doesn't matter because you're not looking at that! The slight ridge created by the triple layer of fabric on the left-hand edge of the foot makes a nice line to follow and makes it harder to accidentally wobble off course.
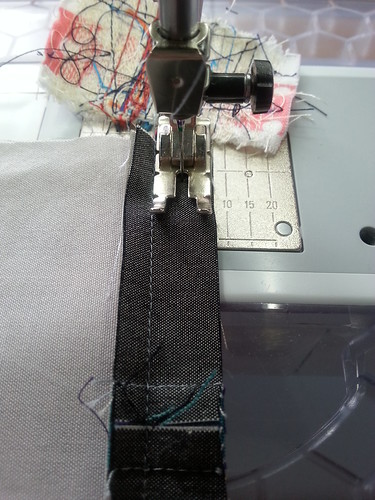 |
| Excuse the tatty thread saver behind the foot! |
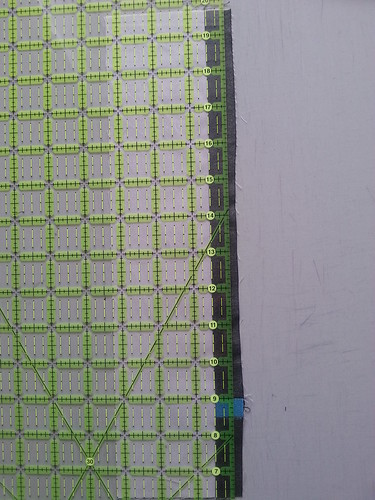
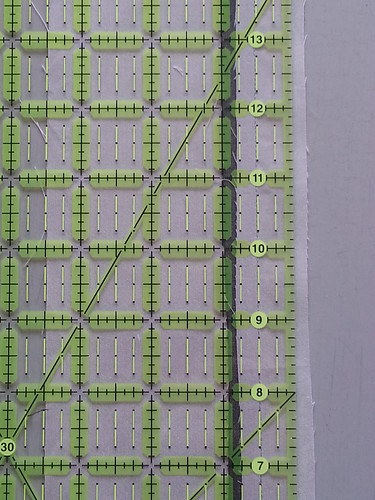
Set the seam and then press it towards the previous strip (the same way as the last seam), and then trim the strip you've just added to 1/2". This time, you can trim it right or wrong side up as the strip is a bit more stable and willing to stay flat. (I did mine wrong side up - you can just see the stitching line under the half inch line of the ruler. I'll have tweaked it a little with my finger nail before trimming as it isn't running true, but it's hard to get it to stay in place without any weight on the ruler.)
Repeat as many times as you like until you have the number of strips you want. In essence, it goes like this:
- Attach the first strip using the raw edges and your usual quarter inch seam allowance
- *Set the seam and then press the seam allowance away from the new strip
- Trim the new strip to 1/2" wide
- Place the next strip under the existing piece
- Sew, following the previous stitching line
- Repeat from * until you want to stop (it might take a while, it's quite addictive!)
If you're sewing a set of strips (as I did), it's easier to cut the strips a little longer than you need (1/2" should do it, slightly more if you don't want to have to pay particular attention to matching the top and bottom ends) and then trim to length once all the strips are pieced.
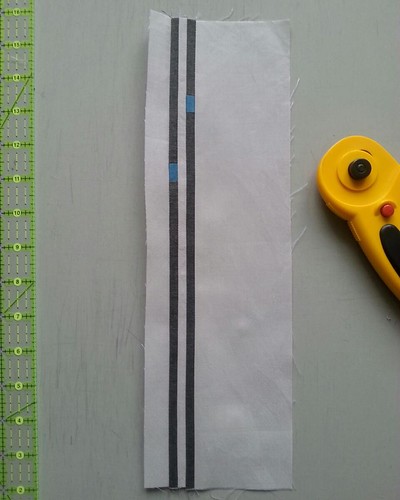
Here's how mine looked after adding four strips, and when it's ready to add the fifth:
And the sneaky peek of all the strips attached, which I posted on Instagram when I was going to keep the subject of this tutorial secret (I changed my mind!). I love how the warp and weft of the Oakshott shows itself in this!
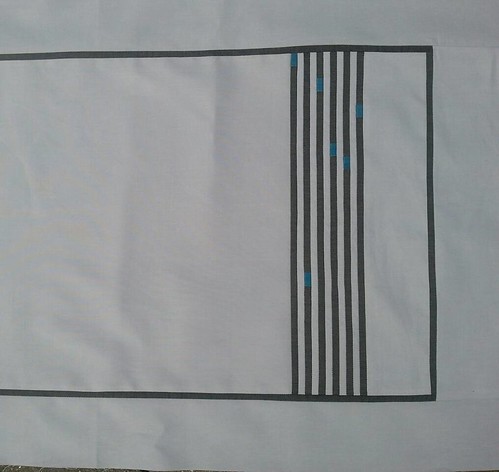
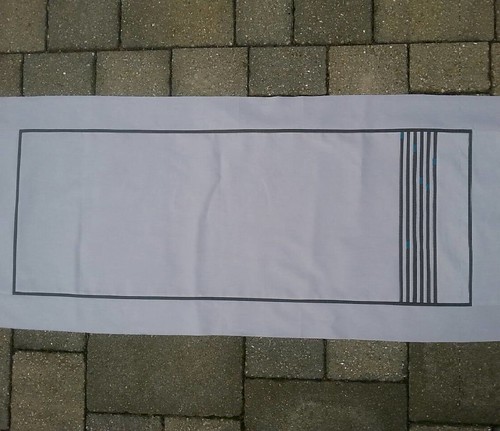
And the final (unquilted) piece. As you may have worked out, I worked from right to left when adding my strips (well, I didn't, I worked from left to right and then turned it 180deg, but you know what I mean) so I didn't have to deal with a longer piece than necessary. I used the same technique to add the narrow border. The final border is deliberately oversized, so I can trim it back after quilting.
And a closer look at the strip set:
I hope you've found this useful and easy to follow*, but if you have any questions, please shout!
 |
| *Clear as mud, I thought. |
P.S. Don't forget to link up your Q4 finishes!
This is helpful! So glad you shared it.
ReplyDeleteThanks for this. I must imagine these tutorials take an age to do. This is a great technique and looks very effective. Must think of a project to incorporate it into.
ReplyDeleteBrilliant. Thankyou Helen for sharing.
ReplyDeletePrecision perfection from you, as always!
Very useful and helpful.
ReplyDeleteIt looks incredibly perfect and neat. I don't have a use for the technique in mind yet, but I'm going to Pin you on my Tips and Tricks Pinterest board so I don't lose the tutorial, as I'm sure I'll use it some time! One question: did you find that the longer the seam the more it wanted to wander off course? Only I have a mental image of creating a huge long strip of this idea, and then cutting it into sections to use as blocks within a quilt...
ReplyDeleteOh, aren't you the clever girl? Thank you for a great tutorial!
ReplyDeleteClever - will have to give it a go - might even include it in garment sewing or cushions ! Nice idea for a man present and great for using scraps!
ReplyDeleteGreat tutorial! My 1/4 inch foot is different, and has 1/4 inch to the right, and 1/8 inch left of the needle. When I do narrow inserts like this, I turn my piece the "wrong" way with the raw edge to the left so that the 1/4 inch side follows the previously sewn stitching much like your tutorial.
ReplyDeleteReading your tutorial it has given me the idea I could use the foot on the other side, too. Would I dare to try 1/8 inch, though ;-)
This such useable information! And timely too! Thank you sew much!! I especially love the tip of using oversized strips, then trimming!
ReplyDeleteWhat a clever idea, thank you for sharing!
ReplyDeleteCool! I love tiny piecing.
ReplyDeleteCool technique! Thanks for the tute!
ReplyDeleteOh now that is nifty! Happy new year hugs and tummy friendly treats for Archie xx
ReplyDeleteWhat a fabulous tutorial! Thanks
ReplyDeleteOh that is clever! Someone once told me to cut double width, and fold in half fir Norris strips but I couldn't see the benefits - your method is fab, and logical!!!!
ReplyDeleteDoh ..." in half FOR NARROW strips ..."
DeleteFar out ... that's genius ...
ReplyDelete