FAL Finish: Mr Fancy Pants Pouch

While I was waiting to get wadding for the fairy quilt (more on that later) and then waiting again for thread to be delivered, I managed to get a few projects from my current Finish-Along list finished. The first was the Bargello cushion from my last post and today I'm going to introduce you to Mr Fancy Pants Pouch (or Mr FPP, if you're feeling familiar).
Back in March last year (so it's only taken just over a year to finish - I call that good going!), I won a giveaway (sponsored by The Village Haberdashery) on Katy's blog for the fabric and notions to make a chevron clutch, which designed by her for The Village Haberdashery.
Mr Fancy Pants Pouch (my name for him, not Katy's or Annie's!) was supposed to look like this:
 |
| Image taken, with permission, from The Daily Stitch (The Village Haberdashery's blog). Photo credit: Annie Barker, The Village Haberdashery |
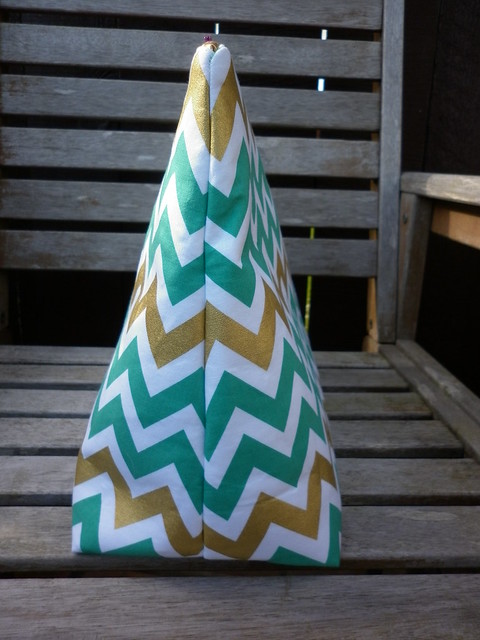
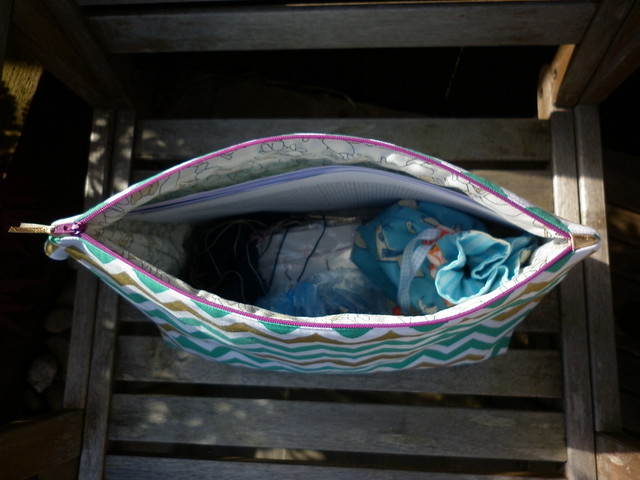
but I knew I'd rarely use a clutch bag (I don't really go out on an evening and can't remember the last time I went out out (or even, using his definition, out!) - M.E. changes all sorts of things in your life, one of which (for me) is not really being able to go after about 7pm and definitely not being able to go somewhere as busy and noisy as a pub, even if I did drink!) and it seemed like a shame to keep Mr FPP in a cupboard, so I decided to give him a new look. I knew I wanted to make the most of the fabric I won (0.5m of both the outer and lining fabric) as well as still use the gold leather and, if possible, the magnetic catch. However, I couldn't work out a design to include all these things so eventually decided to make a zipped pouch which was large to hold a knitting project and include the strap from the clutch as I thought that would be really handy.
I'd read Katy's FAL tutorial about straight-sided pouches on Leanne's blog about eighteen months ago and it stuck in my head as something I wanted to try at some point. I've only made one zipped pouch (when my mam wanted to learn how to make one) so naturally, I decided that my second pouch was an ideal time to try making leather zip ends! I must point out that although I haven't made many zipped pouches, I've made plenty of things with zips in them (cushions, skirts, bags, etc.) so am fairly confident about putting in a zip, it's just the neat zip ends thing that I'm a beginner in *grin*
My first obstacle was pattern matching. I made a template and cut out one side of the pouch (after carefully lining up the peak of a zigzag with the centre of the template, making sure the zigzag ran true across the template and tracing one of the gold zigzags so I could match up the other side) and then attempted to cut an identical piece from the fabric. That was when I discovered that the zigzag wasn't printed as evenly as it looked and this was the best pattern matching I could manage:
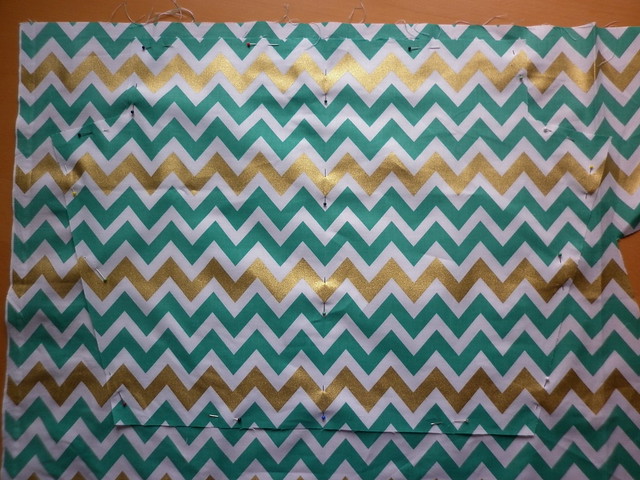 |
| Can you see how some of the pattern matches up exactly and some doesn't? In the end, I admitted defeat and just cut it out! |
Then I cut out the lining pieces, fusible interfacing (I used woven cotton) and fusible fleece/wadding and got busy with the iron. That's when I discovered the next thing: interfacing can shrink. (Some of you may already know that but it was news to me!) These pieces were identical (in size, if not placement of zigzag!) before fusing:
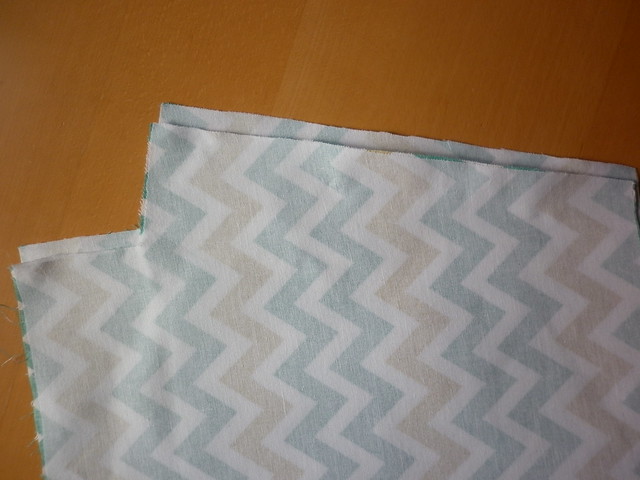 |
| I hadn't washed the fabric so can't be absolutely sure it wasn't that which shrank (although it'd had a good steam iron before I started) but why did only one piece shrink?! |
It's a good job I'd already given up on pattern matching the zigzag before this happened as I now definitely couldn't make the zigzag match! I trimmed the pieces to the same size and then fused on the wadding, fortunately that was uneventful!
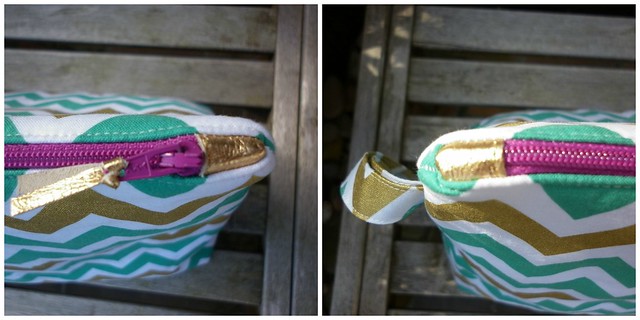
After a bit of 'which zip shall I use because I refuse to go to the shop and buy one when I have plenty in my box, there must be one here that I can use' pondering (I went for magenta in the end) and some sewing (the preparation is definitely the longest part of making a pouch!) and, after using my new wonder clips for the first time when sewing the leather to the ends of the zip (they were really handy for that!), Mr Fancy Pants Pouch was finished:
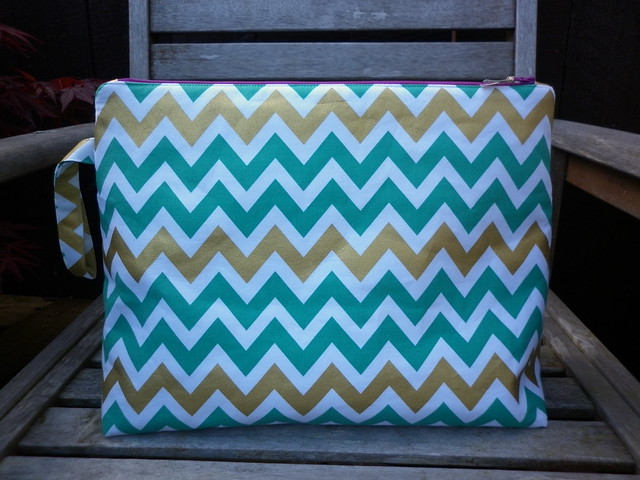
As you can see (and as promised in Katy's tutorial), the sides really are straight, even after the 'shrinkage trimming'!
The zigzag doesn't match along the top but, quite honestly, it was as good as I could get it and it could have been a lot worse! I love the magenta zip with the gold leather and the colours of the zigzags and I'm rather glad I didn't have a black or dark grey zip the right length!
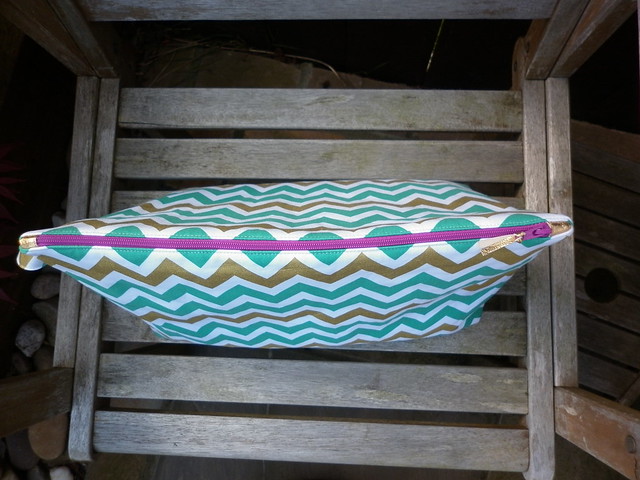
Here he is from the side, complete with ill-matching zigzags (there was no way to match those either but it would be easy enough, I think, to match a stripe or patchwork strip):
The zip ends didn't turn out too bad in the end:
And here he is carrying my current knitting project:
All in all, I'm thrilled with him! Thank you, Katy and Annie, for the fabric and tutorials!
Mr Fancy Pants stats:
Fabric: Remix zigzag in kale and a metallic print from Botanics
Finished size: 14" wide**, 11" high, sides (at base) 5.5"
Thread: Aurifil 50wt in off white ((2021); I had a faulty reel - have you seen what Aurifil sent to replace it?! Crikey, their customer service is marvellous!) and Madeira gold metallic thread for the zip ends.
Now all I need to do is make good on my promise to take him to Whitby for an ice cream and a walk along the pier and then a climb up the 199 steps (and probably sitting on each and every bench on the way up and back down) to admire the view and do a bit of chatting (to Mr FPP, of course) while I knit. It might be a while but I will do it!
** It's a subtle change but when I make Mr FPP's brother, I'm going to start with how wide I want the zip opening to be, rather than how wide I want the pouch to be. I wanted Mr FPP pouch to be 14" wide but, of course, that means that the zip is only 13" long and it would be nice if it were a touch longer so I could get a plastic folder in there without having to bend it. I might need 60cm of fabric for Mr FPP's brother, just in case!
I'll be linking up with Adrianne at the end of the month:

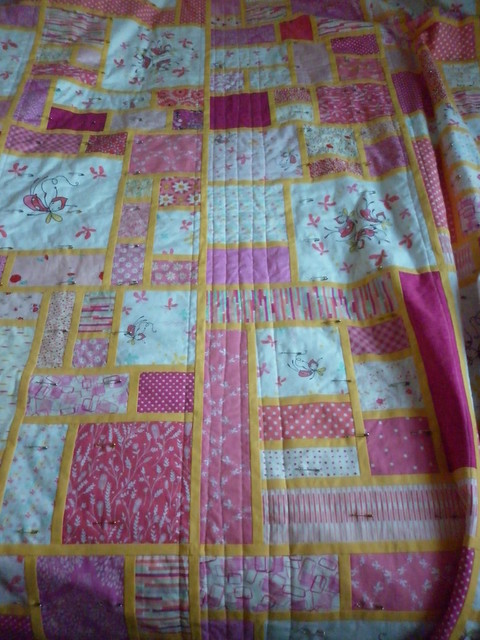
In other news, I started quilting the fairy quilt, and then I unpicked the 1080" of wonky lines I'd done as I just didn't like them and, generally, the lovely folks on Twitter agreed that they weren't wonky enough.
 |
| Ugh. |
It's surprisingly hard to do wonky on a quilt which is 108" long as the lines are so long that you can't see where you've been or where you're going! My machine feeds through straight (that's not a complaint!) so it takes some wiggling to get it go wonky and with all that bulk I just found it hard to get the result I wanted. To paraphrase the lovely and helpful Daniel Rouse, they were close enough to straight to make the wobbles look sloppy rather than intentional - my thoughts exactly!
I started again the next day and the lines now look like this:
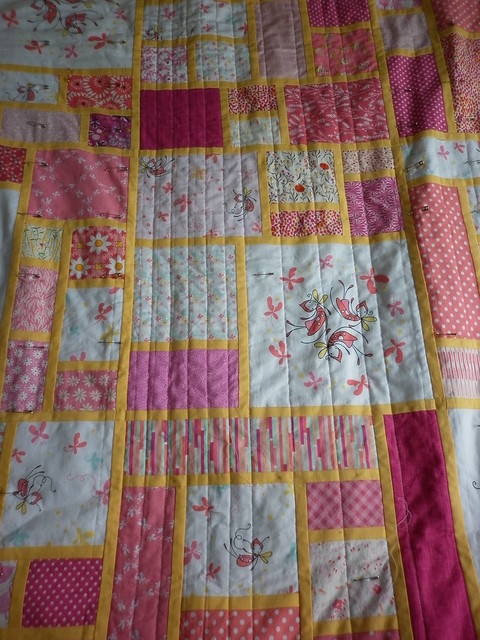 |
| Much better! |
My plants continue to delight me and the aquilegias are out in force at the moment:
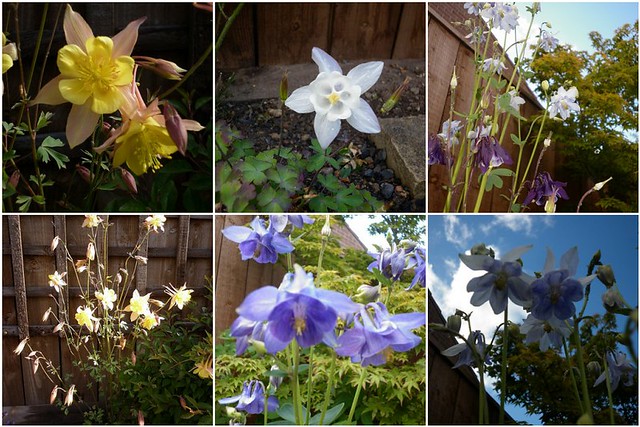 |
| I love the way the morning sun peeks over the back fence and highlights that yellow aquilegia - it really does look like it's glowing! |
The side border is starting to fill out nicely, especially when you consider that I haven't really concentrated on this part of the garden yet:
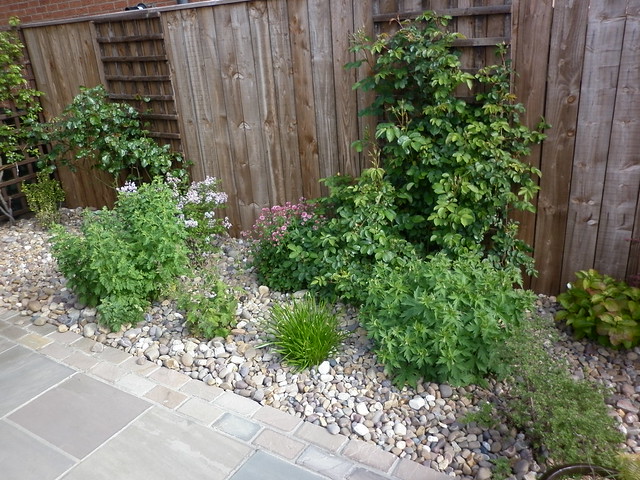 |
| The climbing rose (Rosa 'The Pilgrim') doesn't look quite as good this morning as it got badly battered by the wind... |
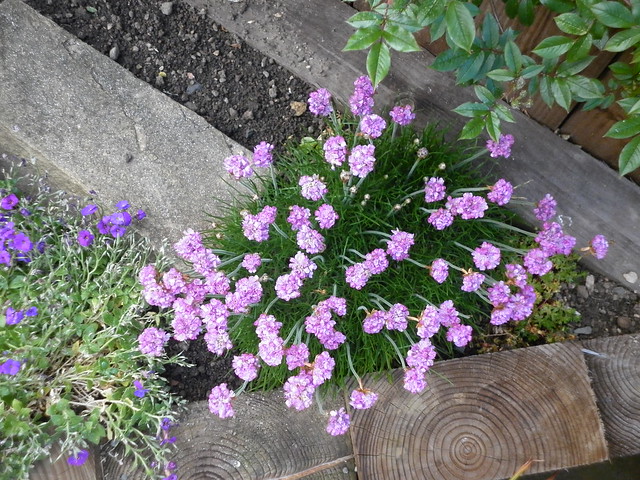
And some of my favourite plants, like this thrift, are in full flower:
The bees are visiting:
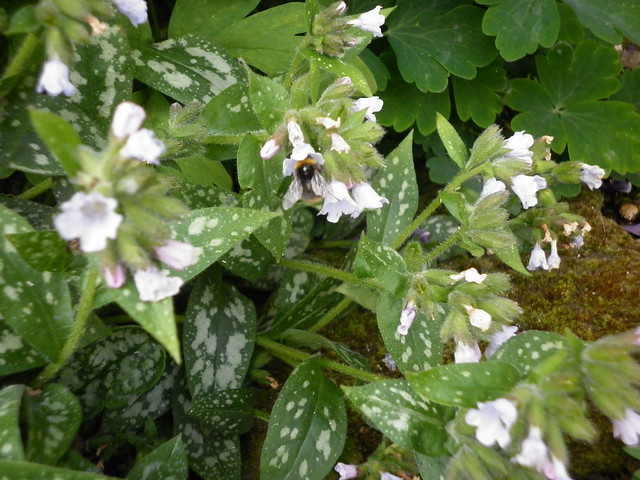 |
| Mr Bee visiting the pulmonaria |
And lots of the plants are showing lots of growth since last year (when they'd spent at least eight months in pots):
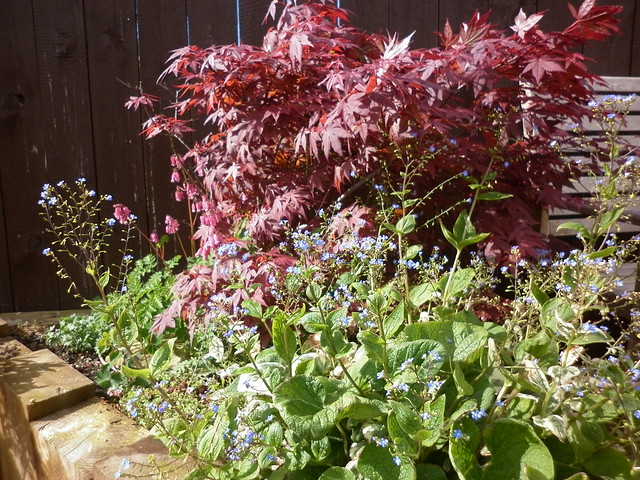 |
| Small but leafy red acer with brunnera and dicentra formosa |
I've added some more plants (including some cosmos, my first ever summer annuals and a bargain at 30p each!) to my large raised bed which is filling out nicely:
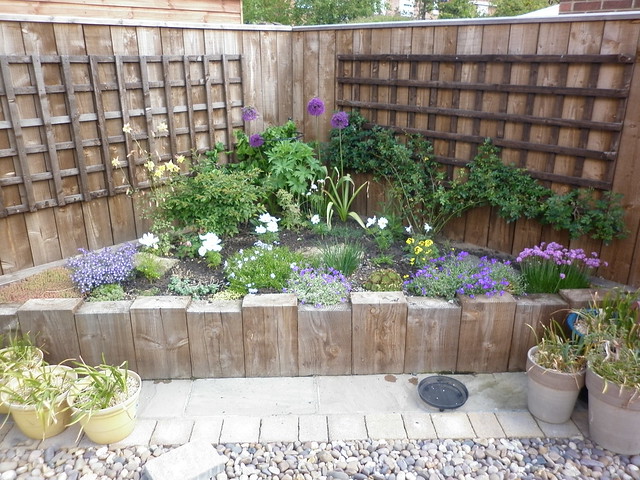 |
| Please excuse that block in the foreground, it's part of a series of them marking out the boundaries of a soon-to-be raised bed! |
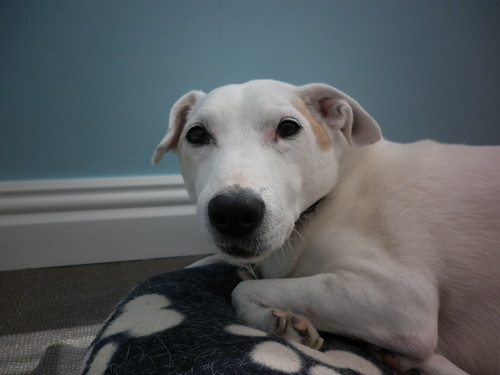
And, of course, Archie is always on the look out for a biscuit:
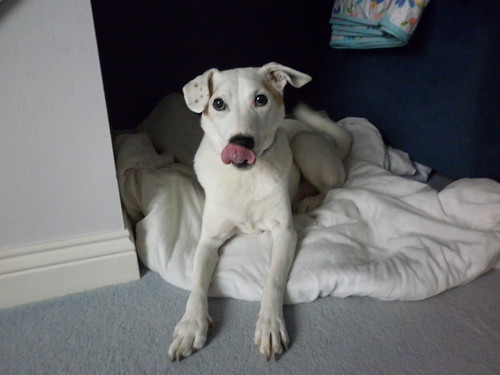 |
| Oh the shame, I've been caught mid-lick! |

...or at least trying to but 'someone' keeps disturbing him!
 |
| What do you want? Does it involve biscuits or walks? 'Cos if not, I'm going back to sleep and I don't wish to be disturbed! |
Thanks for popping in!
Two lines a day is a good way of doing it, steady progress. Nice work on Mr Fancy Pants!
ReplyDeletelove all your flowers and the garden that you show towards the end o your post! that is a nice little bag too and Archie of course is gorgeous as always!
ReplyDeleteOh, the stress of being the "wonder dog"! Go back to sleep, precious one. ♥
ReplyDeleteMagenta was a great choice - goes perfectly. Your garden is looking really lovely and I love the photos of Archie, mid lick made me laugh!
ReplyDeleteThat was a pretty bold move making your cute zip case male. I've had issues with not being able to be wonky enough too. Who knew it would be so hard to do on purpose when it's so easy to do on accident? Love Archie. I'm a white spotted dog addict. I have had four Jack Russell Terriers. Can't get Archie's scale with those photos but he looks like he could be a smooth coat JRT. Thanks for sharing.
ReplyDeleteLove the quilting on the Fairy Quilt! Awesome garden pics!
ReplyDeleteThe purple zipper is exquisite on your chevron pouch! Gorgeous pics of your growing garden. jxo
ReplyDeleteI am also glad you used a bright zip there! It looks good. And yes, no matter how hard you try to pattern match there are fabric variables that defeat!
ReplyDeleteMr FPP is fab, great matching and you obviously paid attention in Katy's maths lesson!!! The fairy quilt quilting Is looking fab too - boo to the unsewing, but yay to the straight lines! Mine are always liberated, it seems I can't do straight!
ReplyDeleteGarden and Archie are looking great xxxx
I love that bright pink zip you chose for this purse. Great choice. Your garden looks lovely too. I'm visiting as a member of the official 2015 Finish-Along cheerleading squad.
ReplyDeleteOh Bravo .. I can vouch for how successful your pouch production is, now. . . . . ooo that rhymes!
ReplyDeleteLove this zig zaggy one . .what a pain you went through however.
Love the close ups of Archies ears and whiskers!