City Walk: an Oakshott 'Metro' project
Sometime in May, Lynne asked if I'd be interested in making a project with one of Oakshott's new fat eighth colourshott bundles. (These will be available at the Festival of Quilts in August and, I assume, on the website somewhere around the same time.) After a little ponder about whether I could manage to make a whole project (and write the tutorial) within the time frame (deadlines and pacing don't necessarily go together!), I said yes and I'm so glad I did!
I missed all the pointy elbow emails that came as a result of us calling dibs on our chosen bundles as I was out with my mam and so I was left with the 'mystery' bundle which, a couple of days later, was revealed to be a 'neutrals' bundle. Not my usual stomping ground but I decided to decline the kind offers to swap (we hadn't yet seen a photo of this bundle so I had no idea what I was going to get!) and accept the challenge. Again, I'm glad I did as this gorgeous 'Metro' bundle arrived:
 |
| 'Metro' bundle from Oakshott |
I decided to take advantage of the fact that the bundle contains two identical fat eighths (the bottom and fourth from the bottom fabrics, which are off-white) and create a project which required background fabric, as well as one which took advantage of the differing values in the greys and creams. Most (all?) of my projects involve traditional blocks and this one is no exception: I chose to use the traditional Walking Triangles block (source: 5,500 Quilt Block Designs by Maggie Malone ISBN 0-8069-7749-3) to create my 'something'.
The block looks like this:
 |
| Walking triangles block from 5,500 Quilt Block Designs by Maggie Malone |
and, as you can see, is made up of four identical but rotated units:
 |
| Walking Triangles unit - source as above |
I'm sure you're wondering when I'm going to get round to telling you what I made, aren't you?! Well, as you may expect from me, it's not necessarily the most straightforward thing in the world...
I decided to make a block roll (used to keep pieces in the right place while you're sewing and which rolls up to keep your pieces safe when you're not using it) as I use them a lot when I'm hand piecing, as well as when I'm machine piecing. They're very handy when you've got a block with lots of pieces which are the same shape but different colours, as you can carry it to the ironing board, press the seams you've just sewn and put the pieces back in the right place. It helps eliminate that moment when, after piecing the final seam, you hold up your block and realise that you've got the star points on backwards or two red pieces next to each other.
Well, that all seems quite straightforward, doesn't it? The thing is, I wanted to be able to do something with it when I wasn't using it (other than putting it in a drawer, that is), so I decided to make it into a little quilt as well so it could either hang on my wall or look after block pieces.
Here's the front of the project:
 |
| City Walk - you can't tell but it's in its little-quilt-on-the-wall rôle here! |
Here's the back:
 |
| It has hanging triangles for when it's a little quilt and a tie and wadding back for when it's a block roll. |
And here it is when it's in use as a block roll:
 |
| From left to right: a block on the back of the block roll (the tie is just tucked to the 'front'), how the tie is secured and how it looks from the other side. |
Right, let's get cracking with the tutorial, shall we?
City Walk block roll-cum-little quilt
Finished size approximately 20" x 20" (there are 252 pieces in the centre design so the finished size very much depends on the accuracy of your seam allowance, hence the 'approximately'!)
You will need:
One Oakshott colourshott 'Metro' F8 bundle
A copy of either template A or template B
Wadding - 22" x 22" (I used Warm and White)
Fusible fleece - 20" x 20", this doesn't have to be exact as it will be trimmed (I used Vilene H640)
Thread for piecing (I used pale grey)
Thread for quilting (I used a cream which matched the pale cream in the bundle)
Thread to match/contrast with the medium grey fabric (this is for top stitching along the tie)
Tacking thread
Black 'piecing' thread (for the edge finish)
Dowel approximately 20" long (for hanging the little quilt)
Usual sewing kit of pins, needles, scissors, etc.
Whatever you need to prepare templates and cut fabric using your preferred method.
Note: If your sewing machine doesn't like quilting something which just has a layer of wadding on the back (or if you're hand quilting or using a wadding which isn't as smooth as Warm and White) then you will also need a 22" x 22" piece of fabric to put behind the wadding. This won't be seen and so could be a piece of calico, fine lawn or even a piece of sheeting or old pillowcase!)
Other things to note:
If you are machine piecing, use a scant quarter inch seam throughout unless otherwise stated.
Please read the whole pattern before starting.
Before I tell you which pieces to cut, I need you to know that I hand pieced my blocks by drawing round templates (for all block pieces) so full rotary cutting instructions aren't available. Some of the pieces can be cut using a rotary cutter but the rest will need to be cut using a template. (I'll come to that in a moment!) If you are machine piecing/rotary cutting all your pieces then you need to cut the rectangle (which needs to finish at 3" x 1") at 3½" x 1½" and the HST (which needs to finish at 1" x 1" along the shorter sides) at 1⅞" x 1⅞" and cut in half along the diagonal.
Cutting the block pieces
Prepare the following fabric pieces:
 |
| From left to right: the off-white pieces, the pale cream pieces and the dark cream pieces you need (just in case you can't read my writing!) |
 |
| From left to right: the pale grey pieces, the medium grey pieces, the dark grey pieces and the black pieces you need. |
The templates are available to download here or here. There are two sets of templates available (A and B) as I wanted people to be able to choose whether their triangles rotated clockwise or anti-clockwise. When printing the templates, please make sure that you are printing 'actual size' rather than scaling the page, etc. The rectangle should measure 3" x 1". Only use one of the sets in a project (i.e. don't use a mix of A and B unless you want some of your triangles to rotate in one direction and some to rotate in the opposite direction!). Thanks go to Lynne for making my lovely templates!
Please also note that, as these are hand piecing (or EPP) templates, the seam allowance is not included so if you are rotary cutting with these templates, you must add a quarter inch seam allowance all round.
When preparing your pieces, please be aware that placing the template right side up on the wrong side of the fabric will result in your pieces being reversed. This is not a problem but will mean that your triangles will rotate in the opposite direction to what you expect! If you are rotary cutting your pieces then this will not affect you as the Oakshott colourshott fabric has no right/wrong side so you can just turn your pieces over! It only really affects those of us who mark sewing lines/intersection dots on the wrong side of the fabric.
I haven't provided detailed instructions on how I hand pieced these blocks but I took photos at each step along the way so, if you're interested in a 'this is how I prepare my pieces and stitch them together' tutorial, please shout and I'll create a special page on the blog.
Stitching the blocks
Stitch your pieces together to create the following (3" finished) units:
 |
| From left to right: dark cream/black, dark cream/dark grey, dark cream/medium grey |
 |
| From left to right: pale cream/dark grey, pale cream/medium grey, pale cream/pale grey |
Tip: all of the grey triangles have a pale cream half square triangle (HST) next to them whereas all the cream triangles have an off-white HST triangle next to them.
Press seams as shown:

Tip: trim back any dark fabric that is hanging over the off-white/pale cream fabric in front or it will shadow through to the front.
In this photo you can see where I've trimmed a tiny bit off the seam allowance of the medium grey fabric:

Then piece the units together to make the following (6" finished) blocks:
 |
| Two dark cream/black units paired with two pale cream/dark grey units |
 |
| Two dark cream/dark grey units paired with two pale cream/medium grey units |
 |
| Two dark cream/medium grey units paired with two pale cream/pale grey units |
And then stitch together following this diagram:

If you're hand piecing, here's how to press and swirl your seams:

Tip: if you are piecing triangles which rotate in the opposite direction then your seams will also swirl in the opposite direction!
If you're machine piecing, you will probably want to press the seams open at this point to reduce bulk at the intersections.
Adding the borders and cornerstones
Measure your finished centre, we'll call this measurement 'y'. (It will be somewhere around 18" square but it doesn't matter if it's slightly smaller or larger!) Note down this measurement, you will need when you make the back!
Cut four 2" x y" strips from the black fabric. (If your seam allowance is spot on then your centre will measure 18½" x 18½" (i.e. 18" finished) so you will cut four 2" x 18½" strips. And congratulations, getting an accurate finished measurement over 252 pieces is no mean feat; I certainly didn't manage it!!)
Tip: cutting your strips to the same length as your centre will help to eliminate wavy borders!
Cut four 2" x 2" squares from the medium grey fabric.
Stitch two of the strips onto the top and bottom of your centre. Press seams towards the border.
Attach the squares to either end of two of the strips, press seams towards the black fabric and then attach to the centre. Again, press seams towards the border.
Quilting
Lay your top face up on your piece of wadding and pin in place using safety pins.
Quilt as desired, ensuring you leave at least ½" of unquilted space at the edge of each border. I quilted in the ditch around each 'walking triangle' and did this a column/row at a time, as shown in the diagram below. Once I'd quilted down the length of the top, I then fastened off the thread and quilted back up the middle, i.e. from point 8 to point 1. This means there are some ends to fasten off but not hundreds!
 |
| Apologies for the teaspoon - this was taken as I was getting ready to fasten the safety pins! |
I also quilted in the ditch around the inside edge of the border.

Trim the wadding, ensuring that the quilt top is square.
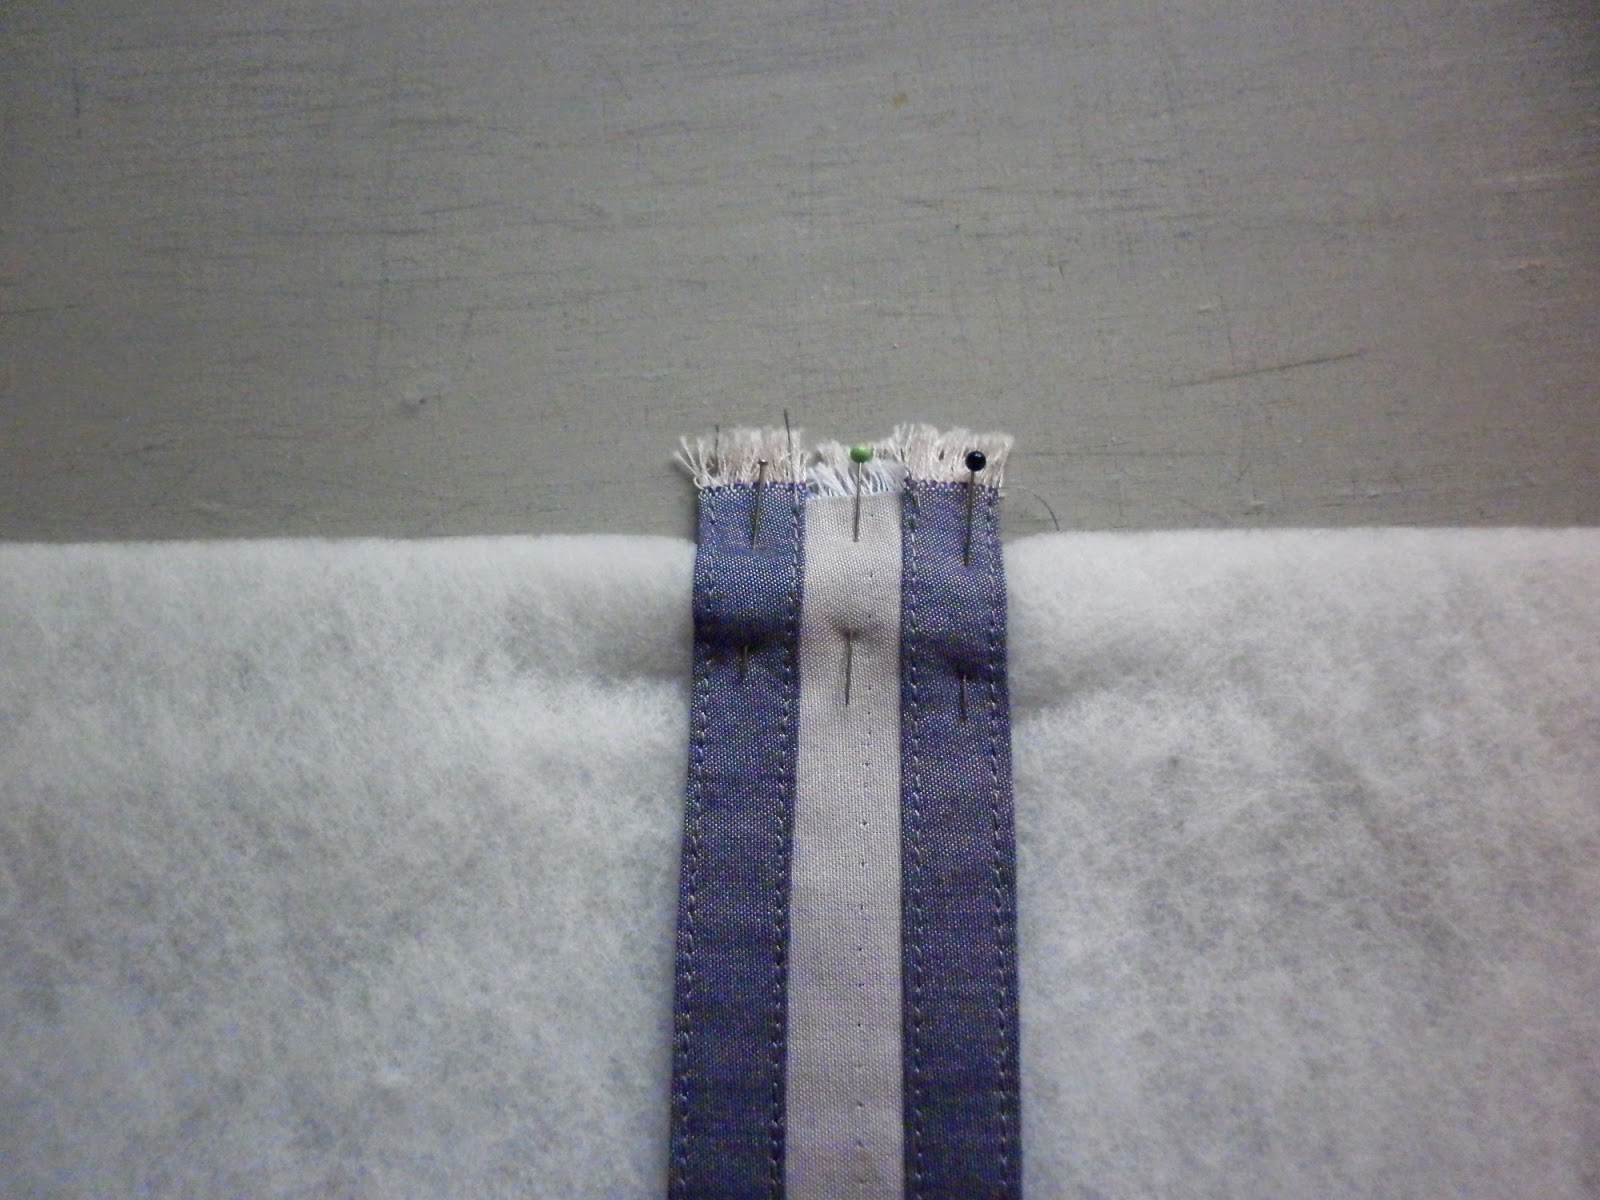
Making the tie - use half inch seams
Cut a strip 1½" x approximately 20" from the pale grey fabric.
Cut a strip 3½" x approximately 20" from the medium grey fabric.
Note: the length of this doesn't have to be accurate as long as the two strips are the same length. Cut as long as strip as you can from the fabric you have left.
Lay the pale grey fabric in the centre of the medium grey fabric and machine tack/hand tack/pin/glue (using fabric-friendly glue) in place.
At one end of the strip, fold the medium grey fabric ¼" over the pale grey fabric and press. Repeat so that the raw edge is encased.
Tip: using steam helps you get a sharp crease. If you find you keep burning your fingers, use the tip of a pin or the point of your scissors to hold the fold in place.
Fold over the tips of the corners to create a triangle; this gives a neater finish when you press the side seams towards the centre.
 |
| Folding in the bottom edge |
Along one long edge, fold the medium grey fabric towards the centre by ⅜" and press. Fold in again, this time by ½" and press. Repeat on the other edge.
 |
| Folding in the sides |
 |
| All sides folded and pressed; all raw edges are encased |
Top stitch (on the medium grey fabric) around all three inner folded sides of the tie and then top stitch around all three outer edges.
Making the back - back to using quarter inch seams!
Cut your piece of fusible fleece to the same size as your quilt centre (the measurement we called 'y').
Cut two 3" x 3" pieces from the medium grey fabric and press in half to create the hanging triangles. Pin in place (on adjacent corners), lining up the right angle of the triangle with the corner of the fusible fleece square.
Cut two 2" x y" strips from the pale grey fabric and stitch to either side of your fusible fleece square, this will also secure the hanging triangles along one side:
 |
| For the sharp-eyed among you, yes, I did have to unpick some sewing because I forgot to add the hanging triangles! |
Finger press seams towards the borders.
Tip: it's best not to use an iron to press the seams at this stage in case you forget that you're not supposed to set the seams and accidentally fuse the fleece to the ironing board!
Measure across the resulting piece (we'll call this measurement 'z') and cut two 2" x z" strips from the pale grey fabric.
Pin the tie, right side up, to the centre of one side of the fusible fleece square, making sure that the tie won't dangle below the finished edge of the top (which will have a seam allowance of at least ½"). It's best to err on the side of caution and make it a little bit shorter than you think! If you look back at the photo of the back of my project (towards the start of this post), you'll notice that my tie is about an eighth of an inch shorter than the back. This was luck, not judgement, as I took a slightly larger than planned seam allowance when doing the edge finish (more of that later) and was very relieved when I discovered that I didn't have a dangling tie!
 |
| Make sure you have at least ½" of the tie showing above the top of the fleece so it's nice and secure when stitched on. |
Pin on the remaining borders and stitch in place; this also secures the tie:
 |
| At this stage, the border seams are just finger pressed. |
Carefully press the border seams (with an iron) but be careful not to catch the fleece with the iron and not to fuse the fleece to the ironing board! It's probably best to put a piece of baking parchment/greaseproof paper under the fleece, just in case.
Attaching the front to the back
Place the front right side down on the ironing board and then place the back right side up on top of it. Fuse the front to the back (i.e. fuse the wadding to the fleece), following the instructions on your fusible fleece. For Vilene H640, use a warm (two spots) iron and a damp cloth and hold the iron in place for fifteen seconds to fuse.
Tip: place a pin in the centre of the top of each layer and line them up before fusing. Doing this will ensure that you get the front and the back the right way up when they are fused. If you wish, you can also place pins in the centres of the bottom of each layer, which will help ensure that the layers are 'square' with each other.
(Take notice of this tip; I wish I'd thought of it before I fused my layers! This where I need to confess that I managed to rotate one of the layers when arranging them on the ironing board (I was probably thinking about which photos I needed to take) and have ended up with my project rotated by 90 degrees! It doesn't matter at all but when I was designing this project, the dark cream triangles were arranged vertically, rather than horizontally. The worst thing is that I didn't notice until it was finished and I was rechecking how many pieces needed cutting from each fabric!)
Carefully trim so that the back is the same size as the front.
Tip: pin the tie to the fleece in a couple of places to ensure it is well out of the way. You don't want to accidentally slice through it while trimming the edges!
Finishing the edge
The project is finished with a traditional knife-edge finish, similar to the edges found on (North Country) Strippy Quilts, which involves turning the edges in and ladder stitching them together to give a neat finish.
On one side of the back, pin the border back to expose the wadding. Repeat (on the same side) on the front:
 |
| I've still got the tie pinned to the back to make sure I don't slice through it - I'd advise you to do the same! |
Carefully trim the wadding by ½". You can do this with scissors if you'd prefer but you need to get a nice straight edge.
Repeat on the other three sides.
 |
| From left to right: trimming the wadding by ½", showing the ½" difference between the wadding and the back and the wadding and the front. |
Turn your work so the front is facing you and fold the raw edge of the (black) border over (towards the wrong side) by ½" and (hand) tack in place. You will need to measure every few inches (or even less, depending on how straight your eye is) to ensure you get the border the same width all the way along. On my project, the finished border width is 1⅛".
Repeat on the other three sides
Repeat on the other three sides
Tip: it is more important to get the width of the border accurate than it is to get an accurate seam allowance! Although you've trimmed the wadding back by half an inch, which means the seam allowance should be spot on, it doesn't always work out that way! The most important thing is that the border is a consistent width all the way round.
Tip: I find it easier to pin the fold in place before tacking and I think it gives a more accurate finish.
 |
| If you start your tacking with a back stitch, rather than a knot, then it is easier to pull out. |
Tip: when you get to a corner, fold one side in and then fold the other side over it. Push the innermost folded edge towards border/wadding seam a little bit to tuck it in.
 |
| I like to put an extra stitch or two in the corners to ensure they're secure. |
Turn your work over so the fleece is facing you. Fold the back (pale grey) border over the top of the wadding by ½", being careful not to squash the wadding down by folding over too far, and (hand) tack in place through all layers. Again, I find it easier to pin first and then tack.
Tip: turn your work over every few inches to check the pale grey fabric isn't showing on the front. If anything, a little bit (i.e. a thread or two) of black showing on the back is better than any pale grey showing on the front.
Repeat round the other three edges.
Tip: when you get to the corners, it gives a better finish if you don't have the two folds on the same side. So, if the corner on the front is folded so that top was folded first and then the side was folded over it, then fold the side first and the top over it on the back. This helps to reduce bulk and makes the next stage easier.
 |
| Edges turned in and tacked, ready for ladder stitching |
Using black thread and with the right side facing you, ladder stitch round all four sides.
How to ladder stitch
Start with a knot and slip your needle into a gap between the tacking stitches and into the black seam allowance (that you've just folded down) and then bring your needle up through the folded edge of the black border. This will hide your knot.
Tip: if the tail of your thread is a little long and is poking up, carefully use the (closed!) point of your embroidery scissors to tuck it out of sight.
Take your needle over to the pale grey folded edge and insert it, making sure you're directly opposite where the thread comes out of the black fabric.
Push your needle through the pale grey folded edge by about ⅛" and pull the thread through, without pulling it tight.
Take your needle over to the black folded edge and insert it, again making sure you're directly opposite where the thread comes out of the pale grey fabric.
Push through the black folded edge by about ⅛" and pull the thread through.
Repeat.
Pull the thread gently but firmly every inch or so (⅛" either way won't make a great deal of difference but ½" may!) and watch as the thread disappears from sight and the edge pulls together. Don't pull too hard or you'll get a puckered edge (and who wants one of those?!); you need to pull just enough for the thread to disappear but not so much that you create puckers.
Tip: you will need good light for this step! Sit by a window or under a good source of artificial light.
It's difficult to take photos while you're stitching but I've tried my best with these and my little 'point and shoot' camera! I've used a turquoise thread so you could see the stitches and, although they mostly disappear when the thread is pulled, it's best to choose a thread to match your fabrics. I chose to match to my darker fabric as I find that it's better to go darker rather than lighter when choosing thread; a thread that is a little paler than needed will show more than a thread that is a little darker than needed. I also used a different needle for the demonstration stitching than I would usually use for ladder stitching: in the photos I'm using a size ten embroidery needle whereas I would usually use a size eleven sharp, which is the slightly shorter and finer, with a smaller eye.
 |
| Starting off |
 |
| First stitch |
 |
| Second stitch |
 |
| A run of stitches - the ruler is to give you an idea of the size of the stitches |
 |
| Pulled together |
 |
| Finished edge |
If, at this point you discover (as I did) that you don't have a dowel long enough then fear not, you can cobble something together! I taped two knitting needles together and they work really well as a hanging rod!
 |
| Making a hanging rod from what you have available |
One final tip: if you discover that your tie is a little long and is dangling below the bottom of the little quilt when it's hung on the wall, try putting the hanging rod under the tie as lifting it by a little may be enough to hide it from view! If it isn't, pin it at an angle across the back to keep it out of the way!
I hope you've enjoyed this (mammoth!) tutorial; I'd love to see any block roll-cum-little quilts that you make, please email me a photo at archiethewonderdogblog at gmail dot com. Thank you!
There's just one last thing...I can't blog without including a photo of Archie! Here he is suggesting that I've spent long enough eating my breakfast and that he thinks it's time I got dressed and took him for a walk:
 |
| It's about time you got yourself back up here, I've been waiting for my walk for ages. Will it be much longer? |
Here is the full schedule of the blogs on the blog hop:
30 June: Jo from My Bearpaw
1 July: Kerry from Very Kerry Berry
3 July: Nicky from Mrs Sew And Sow
Today: Me!
7 July: Sonia from Fabric And Flowers
8 July: Charlotte from Displacement Activity
10 July: Trudi from Trudi-Quilting Prolifically
11 July: Susan Claire from Gourmet Quilter

P.S. I'll be uploading full-sized versions of all the photos in the photo mosaics to my Flickr stream, so if you're having trouble seeing them on a small screen then please view them in Flickr! I made them into mosaics to attempt to reduce the number of photos in the post as it was getting (more) ridiculous but am aware that some of them may be a little small when viewed on a phone or small tablet.
Oh wow, a great project and lovely fabrics, and such a detailed tutorial! That must have taken longer than the piece itself!
ReplyDeleteHi! Your quilt is beautiful! Wonderful pattern which looks great with those neutrals! Thanks for sharing the great idea for a block roll - have to make one or two! Your tutorial is perfect with so many tips and details! Hugs to Archie! x Teje
ReplyDeleteWoweeee what an awesome post! You have put such a lot of work in here and it shows. Absolutely lovely little quilt with a smashing idea on the back! Fabulous tute! Great photo's. Thank you for it all. xo
ReplyDeleteYou weren't joking about the longest tutorial ever written but my was it worth it! You know I absolutely adore this Helen! Still love how the back of your work is as gorgeous as the front!
ReplyDeleteWhen you showed me the bundle last time I was up never would I have imagined just how beautiful the mini would end up. Absolutely stellar job!
ReplyDeletewhat a great idea! I LOVE that block, it looks fabulous
ReplyDeleteSo cool!
ReplyDeletethat is so cool! Love it :-D
ReplyDeletea bundle of neutrals wouldn't be what I would want to have to work with - but you did wonders with it - awesome!
ReplyDeleteBeautiful, I love the subtly of this and the hand piecing. The multipurpose function is the icing on the cake!
ReplyDeleteThat might be the most comprehensive tute ever, such a lovely choice of block and really pretty bundle.
ReplyDeleteAren't you the clever one : ) such little pieces in there. You did a great job!
ReplyDeleteI love it in its little quilt on the wall role - it's beautiful - but how fab that it has a function too:-)
ReplyDeleteGreat job Helen! Gorgeous mini :)
ReplyDeleteWonderful wonderful wonderful, your piecing is so beautiful! XXX
ReplyDeleteTurned out wonderful. Must have been a lot of work.
ReplyDeletewow Helen what a very detailed and informative tutorial! Well done, that's a lot of work. And you did great with the mystery bundle - love how the dark windmills pop-out against all the off whites. I had never thought of using ladder stitch to finish quilt edges like that, but it works really well!
ReplyDeleteSuch a CLEVER project! Thank you for sharing your process!
ReplyDeleteThat is a wonderful project - love that it serves two purposes so beautifully!
ReplyDeleteVery clever and beautifully made.
ReplyDeleteThis is truly beautiful! I really want to try some oakshott now - despite my ban on new fabric!
ReplyDeleteGenius how you've got the neutrals looking so interesting without the addition of another colour, and you've made something useful too. Looks a great tutorial. Must have taken an age to make and do the tutorial. No wonder Archie's saying hurry up!
ReplyDeleteOoh, excellent job on the multipurposing, it looks fab!
ReplyDeleteWhat a cute little project. And your instructions are excellent. Thank you.
ReplyDeleteLove it Helen, and the colours are perfect
ReplyDeleteGreat bundle. I love what you did with it too.
ReplyDeleteSimply stunning!
ReplyDeleteYou keep amazing me.
ReplyDeleteSo pretty!
Your description is SO detailed, that even I understand all of it. Thanks for sharing.
And Archie seems as desperate as our cats. Those animals have to endure a lot while we are doing our handcraft, haven't they?
Beautiful quilt
ReplyDeleteThis is such a clever block. The effect is beautiful in your bundle colours and I love the way you can use it as a block holder or wall hanging. Thank you for sharing and giving such a detailed tute :)
ReplyDeleteOne word - ingenious!! Love it!! kthurn@bektel.com
ReplyDeleteFinally!
ReplyDeleteI get to log in and find Archie (Helen) has has has...well...has...blown all tutorials out of the water .. this is amazing . .. this is gorgeous . . .How clever...how useful . . how precise . .How Bl**dy Marvellous.
Love your stitching.
Love your block.
Love the idea.
Love the fabric and how the quiet colours sing with you manipulation.
I am in awe.
You did a stunning job with an amazing bundle of fabrics!! I love it!
ReplyDeleteSo you mean to say that not everyone runs from their chopping board, to the ironing board and then on the the sewing machine with bits of fabric chanting row 3, row 3, row 3??? I have recently taken to taking photos of blocks layouts before the whole ironing and sewing stage and they still come out a bit mixed up!!
So lovely to see your beautiful hand stitches and the pencilled seam allowance lines. It makes me think of the step photos from Patchwork 163 (which are some of my favourite things). Really lovely! This looks like the longest tutorial ever - well done - the end result is stunning! x
ReplyDeleteI've said it before, and I'll say it again. That quilt is the business.
ReplyDeleteThis is just gorgeous. I love Oakshotts and this is so very classy!
ReplyDelete