The Blue And White Blighter - A Finish!!!
*gropes around for light switch* *gasps in horror at the dust* *flicks around a tickle stick* *shows age*
Hello!
Today the Q1 finishes link opens for the 2017 Finish-Along and I thought it was high time I started catching up on blogging about my (sort of) recent finishes.
My Q1 FAL list can be found here, and this blog is all about item one, the big blue and white quilt.
I started the quarter in my usual manner: like a greyhound out of the traps. I then continued in my usual manner: having a lie down about quarter of the way round. This time, it was more pronounced because I wanted this quilt finished in time for my mam's birthday in early January.
At the start of the quarter, the project looked like this:
 |
| I don't know what that ball of perle is doing there, I certainly didn't use it to sew down the binding! |
and I just needed to sew down the binding to the back.
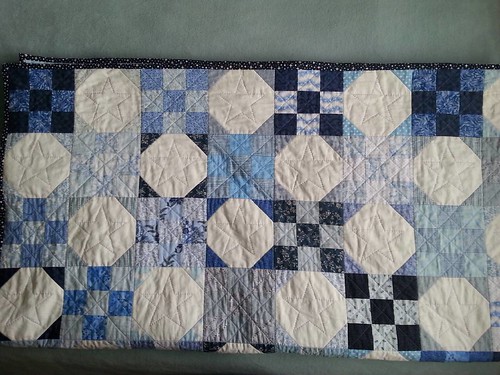
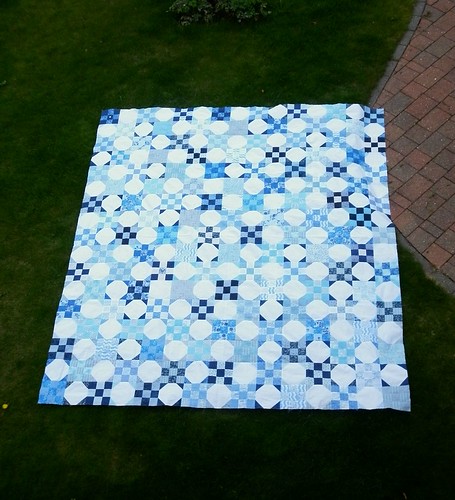
Here's how it looked when I finished it:
I started this project in March 2012, but it had been in the planning since August 2011 when Mam and I visited a local show and started collecting fabrics for it (it's harder than you'd think to find fabrics with only blue and white in them) and planning the size, etc. It first appeared on my FAL list in Q2 2013, when Leanne was the host.
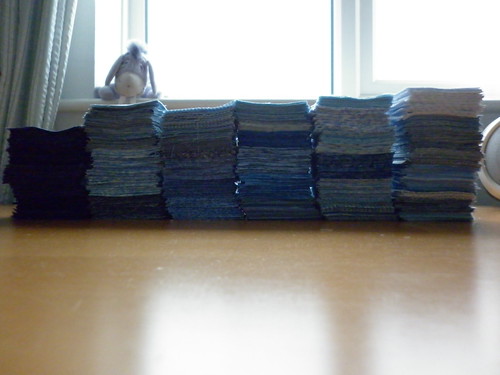
I washed and ironed all the fabrics (including several metres of white on white) and then cut all the blues into 2.5" squares (and made myself ill in the process, I seem to remember):
 |
| I didn't strip piece because I wanted each nine patch to be different. Things would have been easier and faster if I hadn't! |
I was going to mix up the prints in each nine patch:
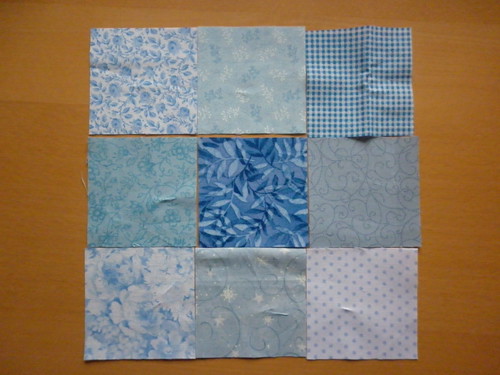
but didn't like it, so sorted all the fabrics by print and arranged them so that each nine patch was a different arrangement of two fabrics (that took a while, let me tell you!):
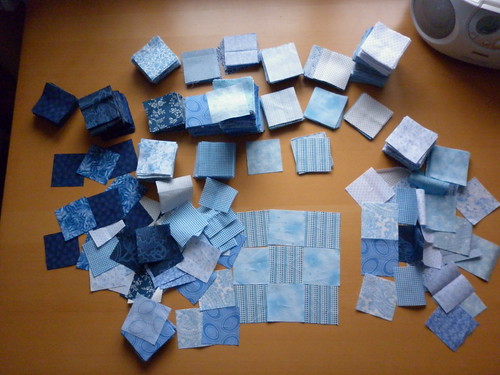
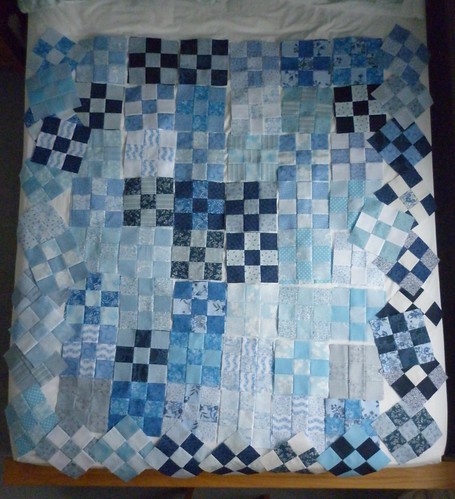
I then made 128 nine patches:
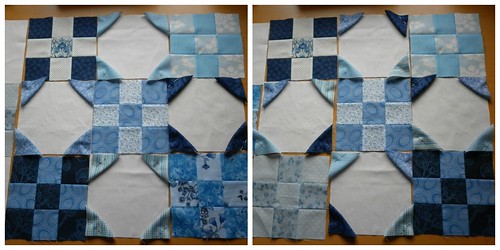
Then I started on the snowball blocks. Again, I thought I'd mix up the prints in each block, but after laying them out, decided I preferred the same print in all four corners:
Things progressed quite slowly, but by April 2013, I was ready to start the mammoth task of laying out 128 nine patches and 127 snowballs and making sure no print was next to itself:
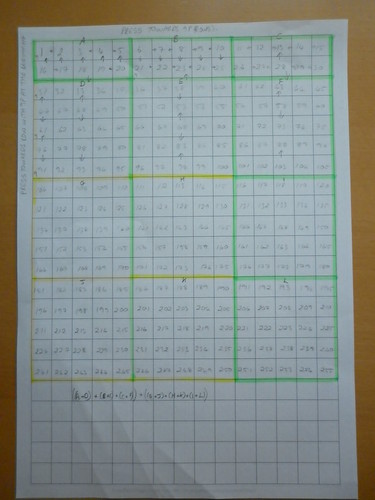
I then labelled each block (slip of paper and a tiny safety pin) and made a map of where they were all going, my piecing sequence and which way each seam would be pressed (I do this for all big projects):
When I started piecing the blocks together, I discovered that very careful pinning was required to get two nice snowball points meeting two nine patch seams. This came as quite a blow and slowed me down considerably. I also discovered that pinning and sewing these seams was really, really tedious. This slowed me down even further. At several points along the way, I doubted I'd ever finish it. In fact, if it had been for me, it would still be in pieces!
Slowly, but surely, I plodded on and in August 2015, I had a finished top which measured 90" x 112":
 |
| So big that the only way to get it all in the frame is to lay it on Mam's front and hang out of her bedroom window! She wasn't impressed when I said she had to stay out there and guard it in case of a strong gust of wind! |
I used Aurifil 40wt 2720 on the top and 2710 in the bobbin. Initially, I thought I would quilt in the ditches between the blocks (horizontally and vertically) and down both diagonals of the nine patches, but when I finished, I realised it wasn't enough, so I added four extra (diagonal) lines per block:
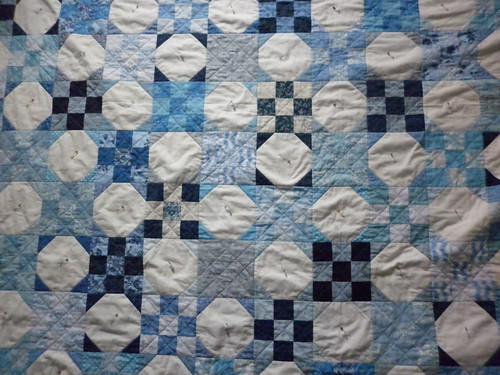 |
| Well worth the additional hours of quilting! |
After several weeks of doing only this (and having a target of fourteen stars a week), I was ready to trim it and add the binding. I finished about a week before Mam's birthday and am pleased to say she was thrilled with it! I'll share a photo of it on the bed in my next post, along with a couple of co-ordinating finishes.
Quilt Stats
Design - my own, but it's a traditional combination of blocks
Fabric - assorted blue/blue and white prints, and white on white for the snowballs
Piecing - machine (Aurifil 50wt 2600)
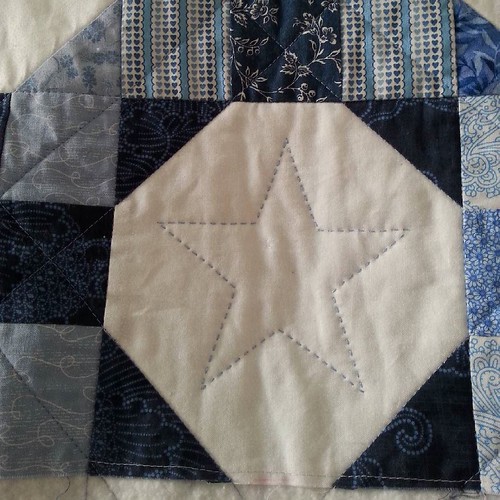
Quilting - machine (Aurifil 40wt 2720 and 2710) and hand (Anchor perle 12wt 128)
Wadding - Warm and White
Size - 90" x 112"
Number of appearances on FAL lists - 10
And here's another photo of the finish (same as the one at the start), just in case you've forgotten what it looks like after all that!
I'm linking up:

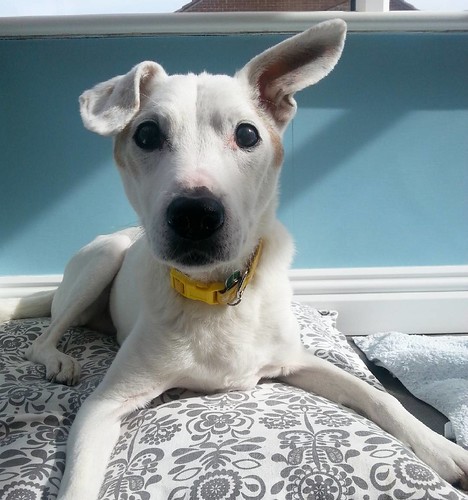 |
| Finished? After all this time?! This calls for tuna! |
Thanks for popping in!
I love your beautiful blue and white quilt. Your thought processes and development of the pattern make an interesting read. Did Archie get his tuna?
ReplyDeleteIt's a good thing this quilt lives at your Mam's.
ReplyDeleteSeeing as I know where you live.... it could well have gone missing when you weren't looking. L-O-V-E it
Great description of the whole process too.
What an epic journey, what an amazing quilt, and what a pleasure to see you back in the blogosphere... It's a triumph of combined guilt and persistence over the very understandable urge to chuck it in the Too Hard basket, and it's wonderful.
ReplyDeleteWhat an effort! I finished a blue & white quilt last year (a small one!) and I know just what you mean about colour placement. A very big WELL DONE its fabulous! Hope Archie got his fish dinner!!
ReplyDeleteLorraine.
Great finish!!! Enjoyed reading your journey on the making of this quilt. I'm not sure I would have stuck with this. Archie deserved his tuna for this quilt along.
ReplyDeleteHooray!!! Congratulations :-D
ReplyDeleteWhat an awesome achievement! :-)
ReplyDeleteThis is so so beautiful! Blue and white are the best colours! I love your design and the quilting! Hugs to Archie! x Teje
ReplyDeleteWell done on finishing - what a marathon but its absolutely gorgeous!
ReplyDeleteI've been in a blue phase lately myself - with quilting, not my mood thank goodness. Congratulations on an incredible finish. the hand quilting adds so much. It is huge and you did such a good job keeping track of details. On behalf of your fellow 2017 FAL hosts, thanks for linking up and sharing your work! Great Job.
ReplyDeleteIt's beautiful!!!!! I love all the blues!
ReplyDelete